Creating Events for WordPress Event Calendar
What is the Events Calendar?
The Events Calendar is a WordPress plugin that adds calendar functionality to your site. The calendar has multiple view options, including month, week and day views, and a mini calendar and events list for your sidebar. You can make single events, a series of recurring events, and you can import events from other calendars such as 25Live. This article will review how to create events.
To learn how to import events, see our article: Importing Events.
If you don't have the Events Calendar plugin yet, you can request it with our Plugin Request Form.
Getting Started
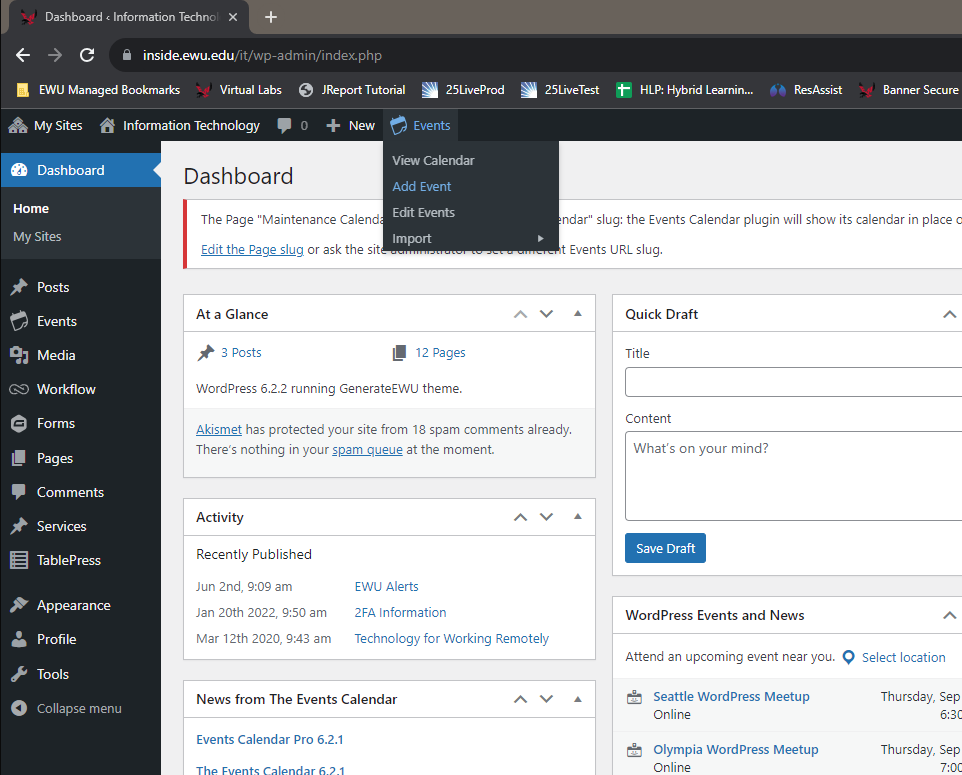
There are two ways to create a new event. The first is to hover over Events in the Admin Toolbar and select Add Event from the drop-down.
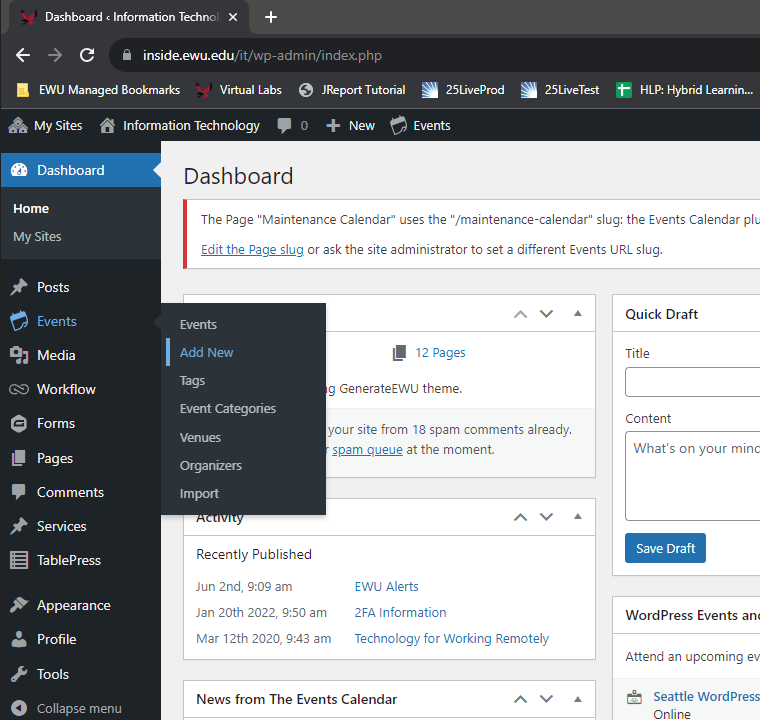
The second way is to navigate to the dashboard of your site, hover over Events in the sidebar, and select Add New.
Both methods will lead you to the same page: the Add New Event page.
The Basics
The Interface
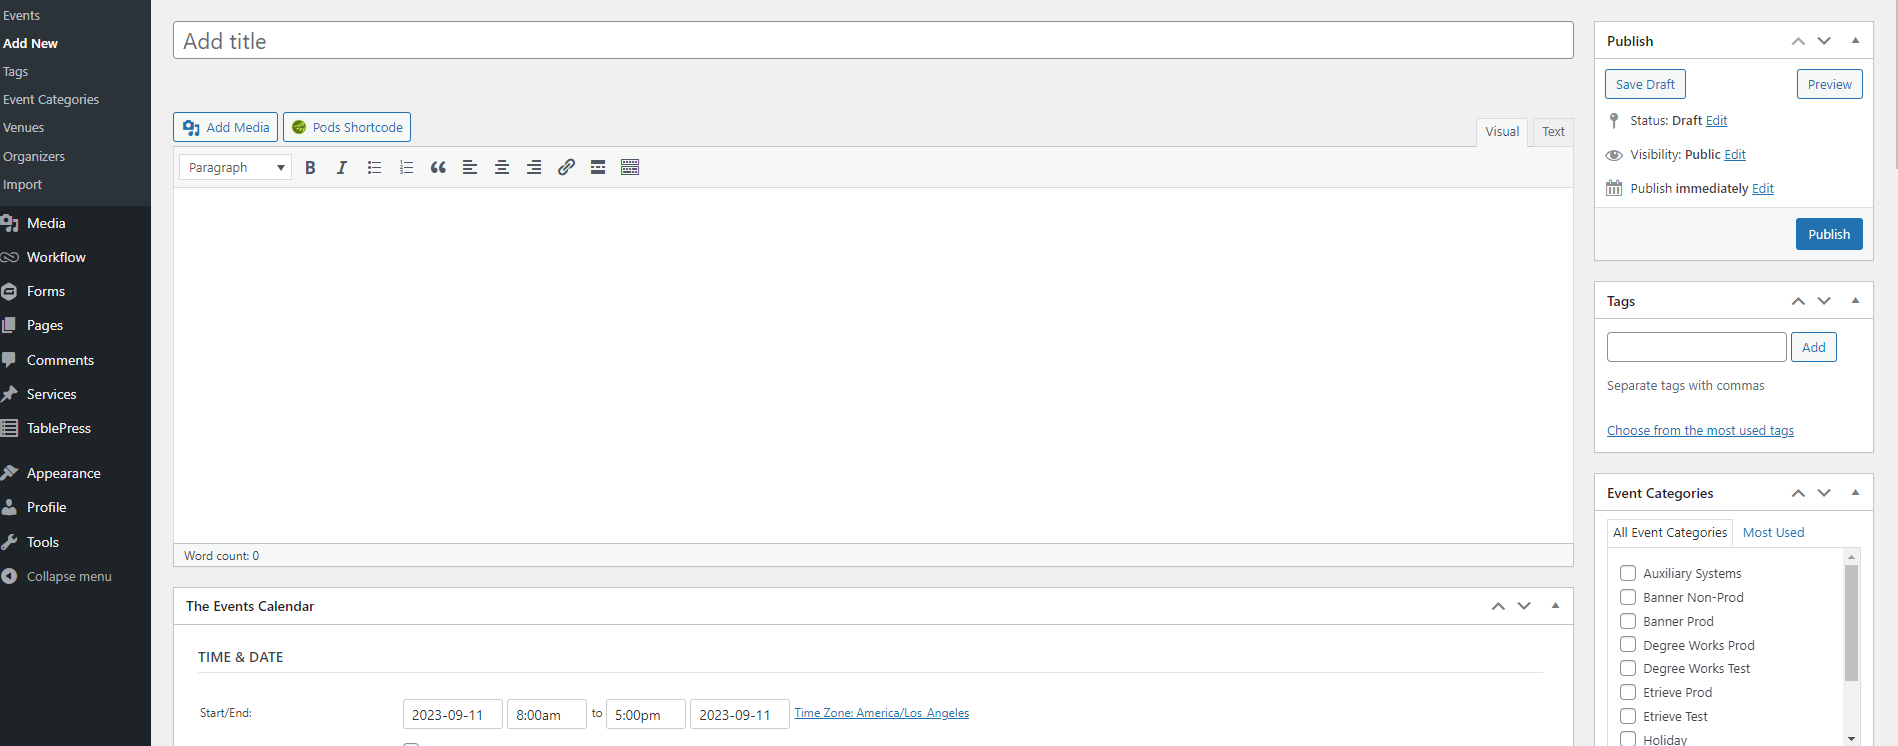
Adding a new event looks similar to adding a new post or page. You have a place for a title, the WordPress text editor to add a description, and the publishing options to the right. For more details about this interface, including publishing options, see our article: Creating a Page.
Add a title for your event. Then add a description in the text editor. As with posts and pages, you can add photos, videos, and other media to the text editor. You can format it however you'd like.
Time & Date
Time & Date is located below the text editor. In this section, select the date and time your event starts and ends. Events may span multiple days. You can also mark the event as an All Day Event instead of determining a time.
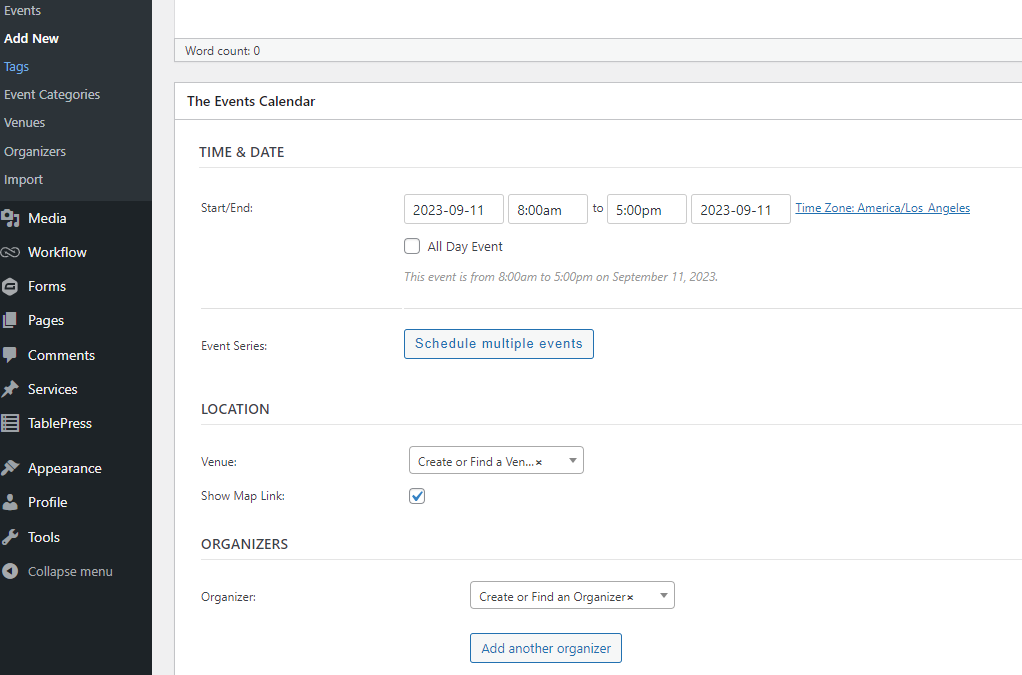
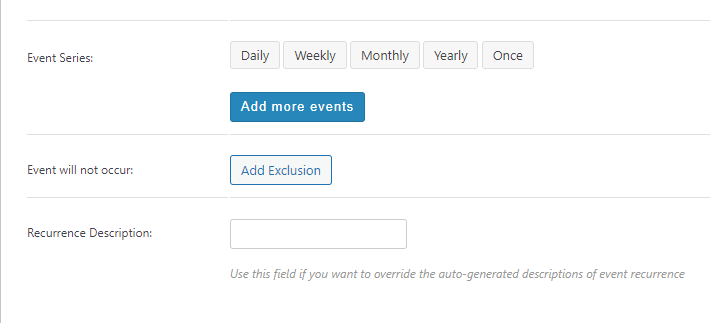
With Event Series, you can create recurring events. To make your event a recurring event, select the Schedule Multiple Events button. Then you can select whether the event recurs daily, weekly, monthly, yearly, or once. Every event in the series will have the same title and description as the original event.
You can also set exclusions for recurring events if you have any exceptions you want to make in a series.
Extra Options
These options are not required, but they do supply information that can help people find or learn more about your event.
Location
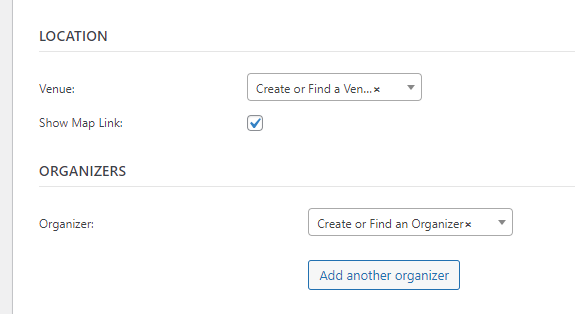
If your event has a location, you can set it here. Use the drop-down to create a new venue or select from existing venues.
To create a venue, select the drop-down that says Create or Find a Venue. Type in the name of your new venue and hit Enter. Fill in the address for your venue.
Organizers
If there is an organizer for the event, enter their information here. You can add multiple organizers.
Event URL
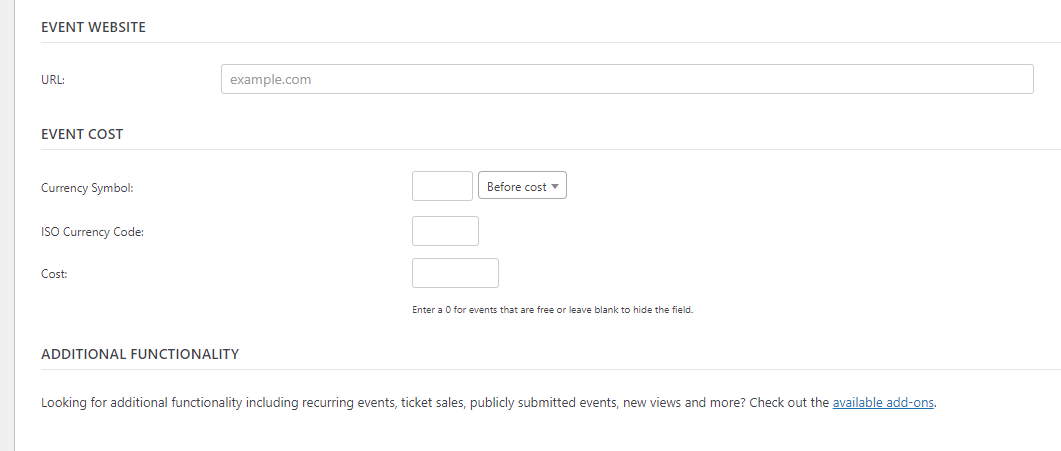
If your event has a website, add it to this field.
Event Cost
If there is a cost to attend the event, you can set that amount here.
Tags & Categories
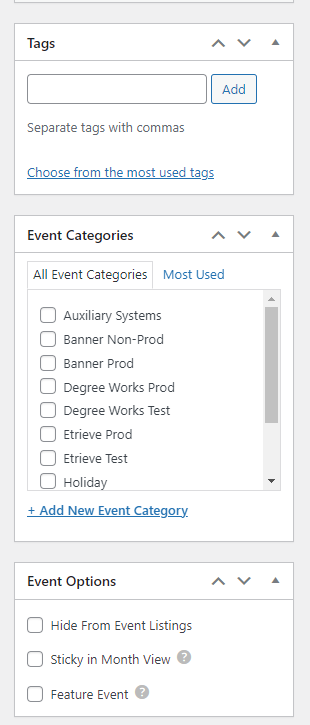
Similar to posts, you can add tags to an event, or sort your events into categories. You can use categories and tags to make your events more organized and easier for visitors to find. For an introduction to categories and tags, see our knowledge base article: Categories and Tags.
The Events Calendar also has knowledge base articles about categories and tags. These are more in-depth and highlight the differences between categories and tags for events versus posts.
Events Calendar - Categories
Events Calendar - Tags
Categories
Categories are a way to group events. A category is usually a broad, yet descriptive word or phrase. Like posts, you can sort events into multiple categories, but it’s best to stick to one.
Tags
Tags are similar to categories, but rather than grouping events, tags label them with searchable keywords. While events should be restricted to one category, multiple tags are encouraged.
Event options
The following options affect how your event displays on your site.
-
Hide from Event Listings - If you want to link to an event post but want to hide it from the main event views, you can check this box.
-
Sticky in Month View - Select this box to display this event first in the list of events in Month view. This is useful if you have multiple events on the same day and want one to be more visible than the others.
-
Feature Event - Select this box to designate your most important events as featured events. Featured events are highlighted in event views, archives, and widgets. Marking an event as featured also automatically checks Sticky in Month View.
Featured image
With this section, you can add a featured image to your event. The image will display in the event post and event views.
Publishing your event
When you have finished creating your event, select the Publish button in the upper right corner. As with posts, you can also save as a draft and publish later, adjust visibility, or set a time for the event to publish automatically. Once you publish, your event will display on your calendar.