How do I add a printer on my Windows PC? (faculty/staff)
EWU now has a way to self-install any networked printer on your university-owned PC.
To get started:
- On your Windows Start menu, find the "Make Me Admin" app and click on the button to request administrator privileges. Not all printers require you be an administrator to set up, however it's easier to do this prior to starting the Papercut printer setup in case they do.
- Look for the PaperCut Print Deploy icon in the lower right of your screen in the task tray (you may need to click the up arrow to see the icon). It looks like a green printer.

- Right-click on the Print Deploy Icon and select View my printers

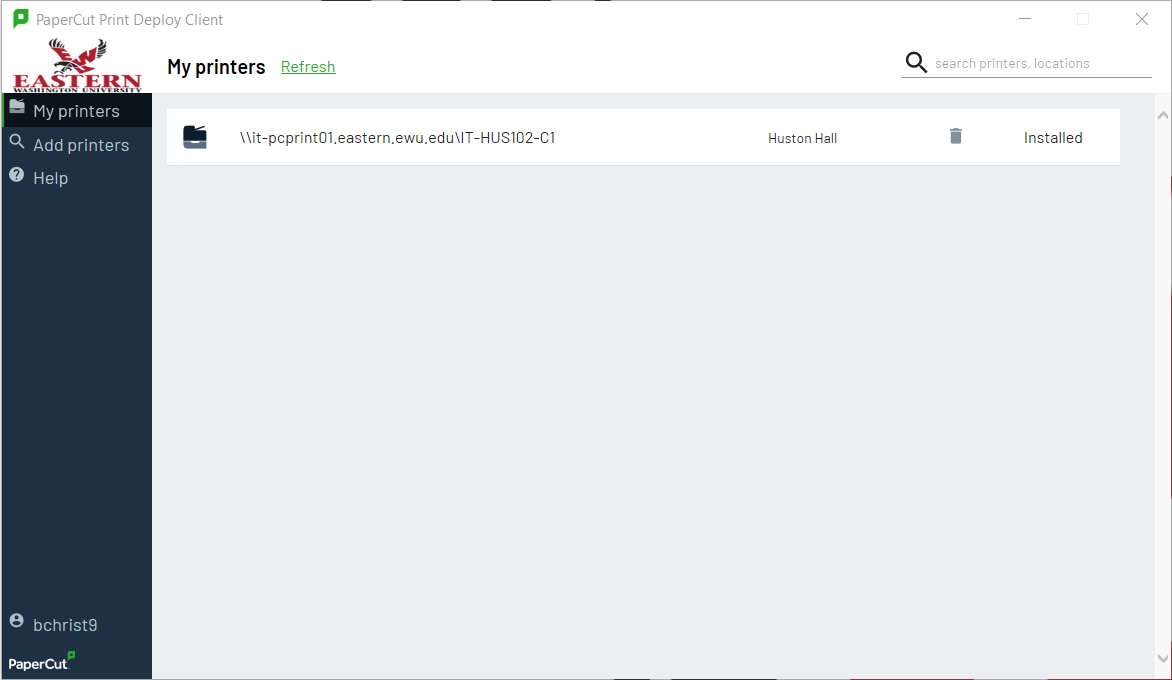
- The main Print Deploy Window will open, showing you any currently installed printers. Some printers may have already been installed for you automatically. Any printers that you manually install will also show up here.

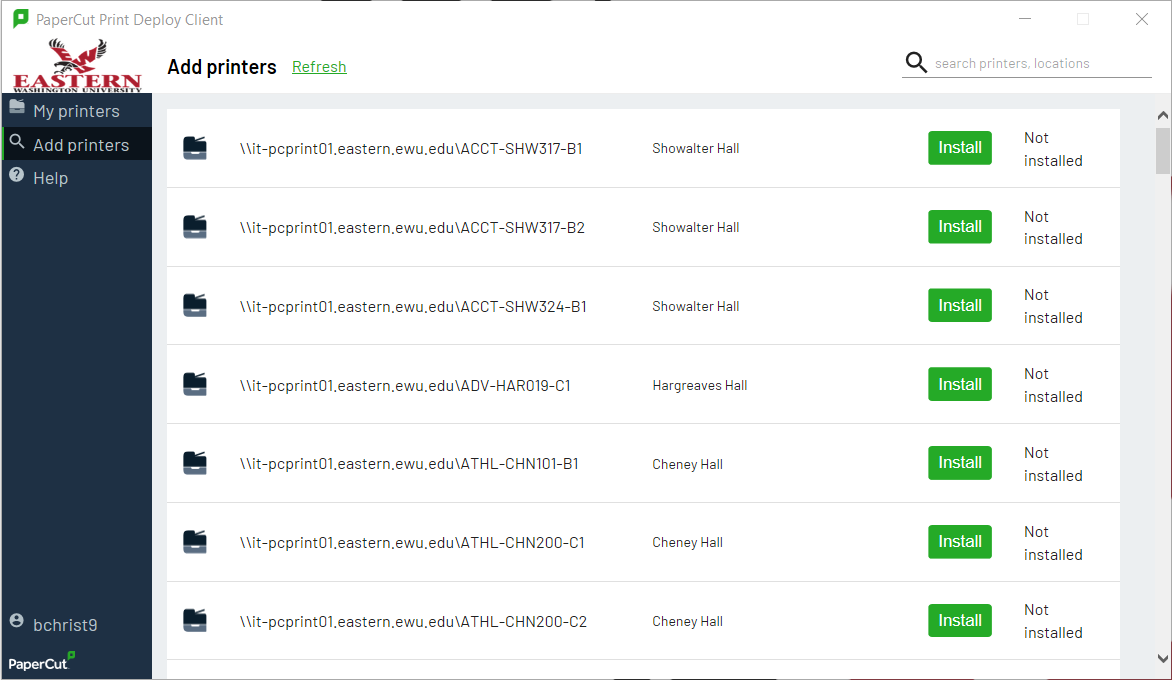
- To install a new printer, select Add printer. Find the printer you want by searching for the printers name. Your printer should be labeled with the papercut name. Click Install. Add as many printers as needed. When done, close the Papercut window. That's it, your printers are ready for use.

Note: You use the PaperCut Print Deploy client to manage your printers. If you remove them manually through the Control Panel, they will automatically be reinstalled.
The EWU Papercut Naming Guide may assist you as well.
